When it comes to photo editing software, Lightroom is by far the most popular. It is packed with features to make your workflow easier when going through thousands of photos.
But when you start using Lightroom, it can feel overwhelming. I know it was for me when I tried to edit my photos for the first time many years ago.
So, to help speed up your workflow process, I am going to share with you five useful hacks and lesser-known shortcuts that I always use to make my experience with Lightroom more effective and efficient.
- Hiding intrusive panels
When you launch Lightroom for the first time, it can feel cluttered with all the intrusive panels everywhere, especially when working on small laptop screens.
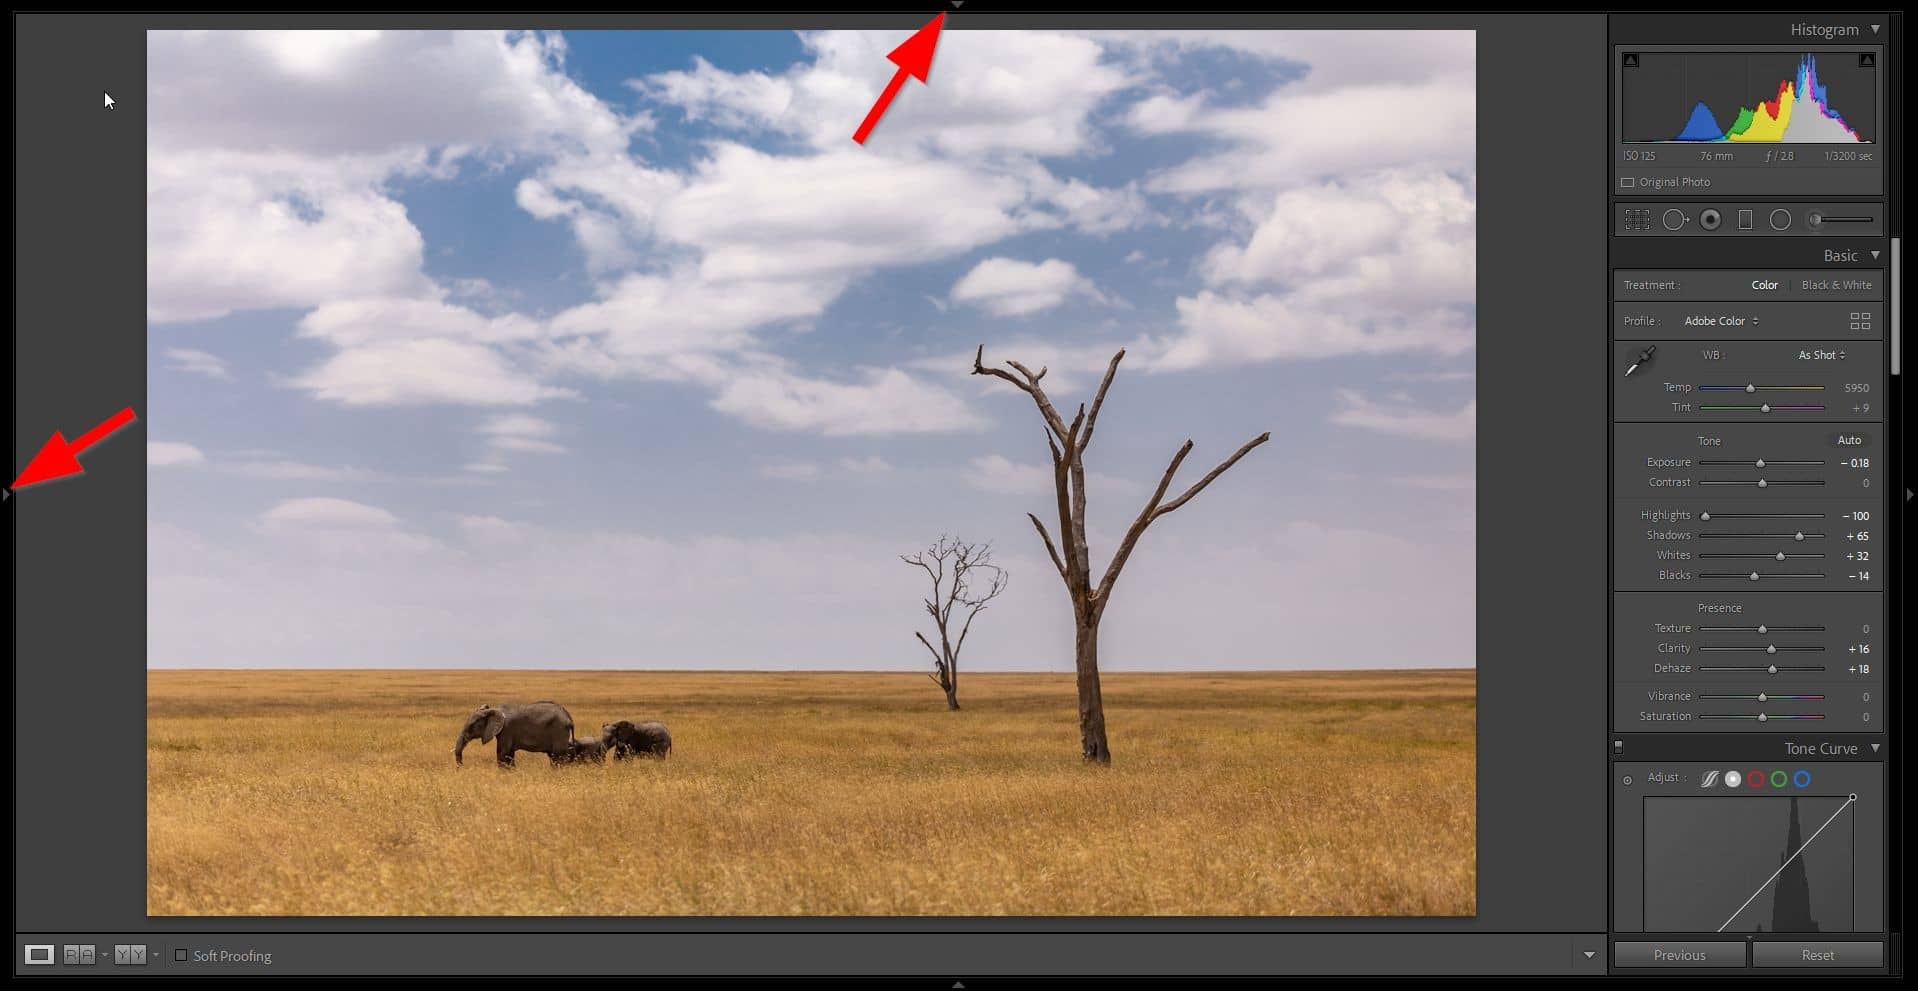
Luckily, you can hide the panels easily by simply clicking on the little triangles on the edge of the screen—you quickly gain a lot more space to work with.
I highly recommend minimizing the panels, especially when in the Develop module. I keep the top, bottom, and left-side panels hidden to maximize my workspace, but I can easily bring them back if needed by clicking once more on the little triangle icons.
- Previewing the before and after images
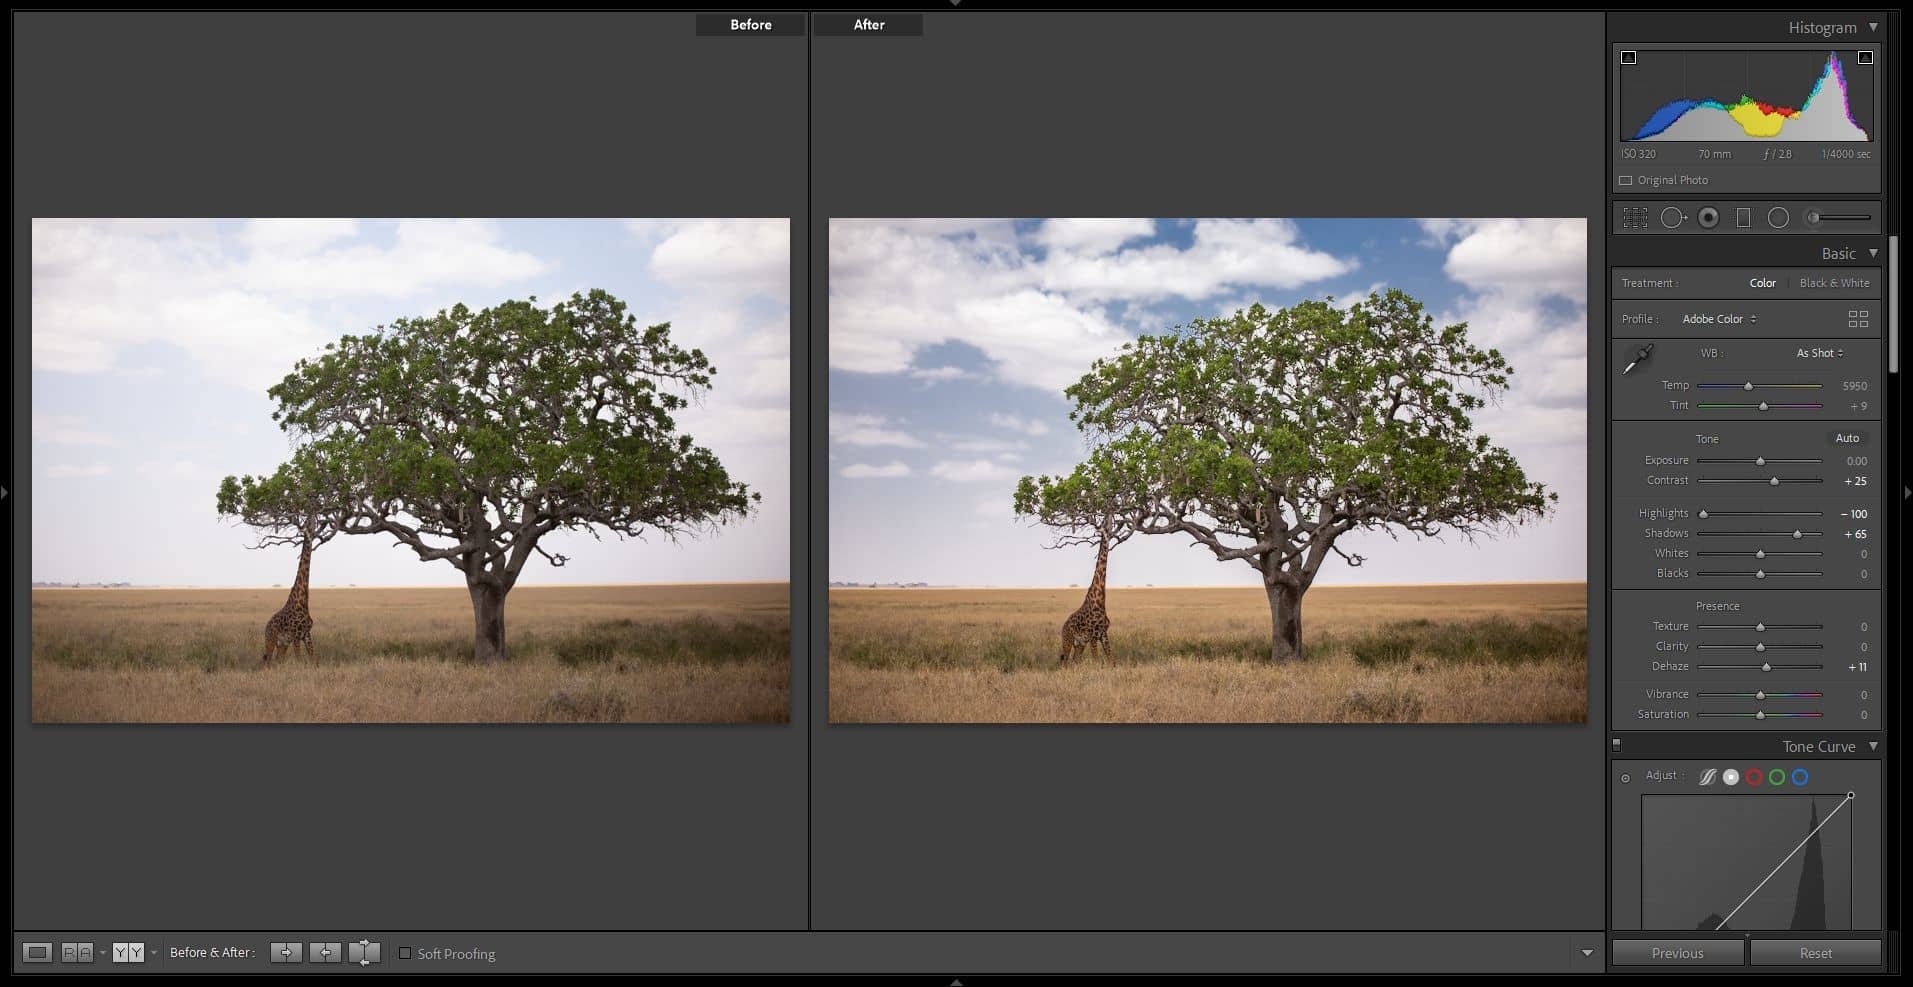
Seeing a comparison of the before and after of my images is one of my favorite features in Lightroom. It allows me to see how far I’ve gone with my processing.
You can bring up the before/after side-by-side comparison by using the Y key on your keyboard Press it once more to go back to your edited image.
You can also switch to a before/after preview on the same image (instead of a side-by-side comparison) by pressing the \ key.
- Removing difficult dust spots
When shooting outdoors, cameras collect dust on the sensor which can appear on the final image.
Fortunately, Lightroom has an amazing spot removal tool that allows you to remove any dust spots or imperfections from your photos by simply clicking on them.
To make sure you clean up all the spots, you can use the “visualize spots” checkbox under the image. This option will invert your image and allow you to detect all the spots easily.

- Showing the clipping warning
We’ve covered before how you can use the histogram on your camera to check if your photos are overexposed or underexposed.
Similarly, Lightroom has a feature that can quickly show clipped areas when editing your photos.
By pressing the J key on your keyboard, you bring up the clipping warning which highlights in red all the blown-out areas and in blue all the underexposed areas.
This can be especially helpful when adjusting the exposure, highlights, and shadows on your image. If you see any red or blue indicators, adjust the sliders to bring back lost details in those areas.

- Changing the crop overlay
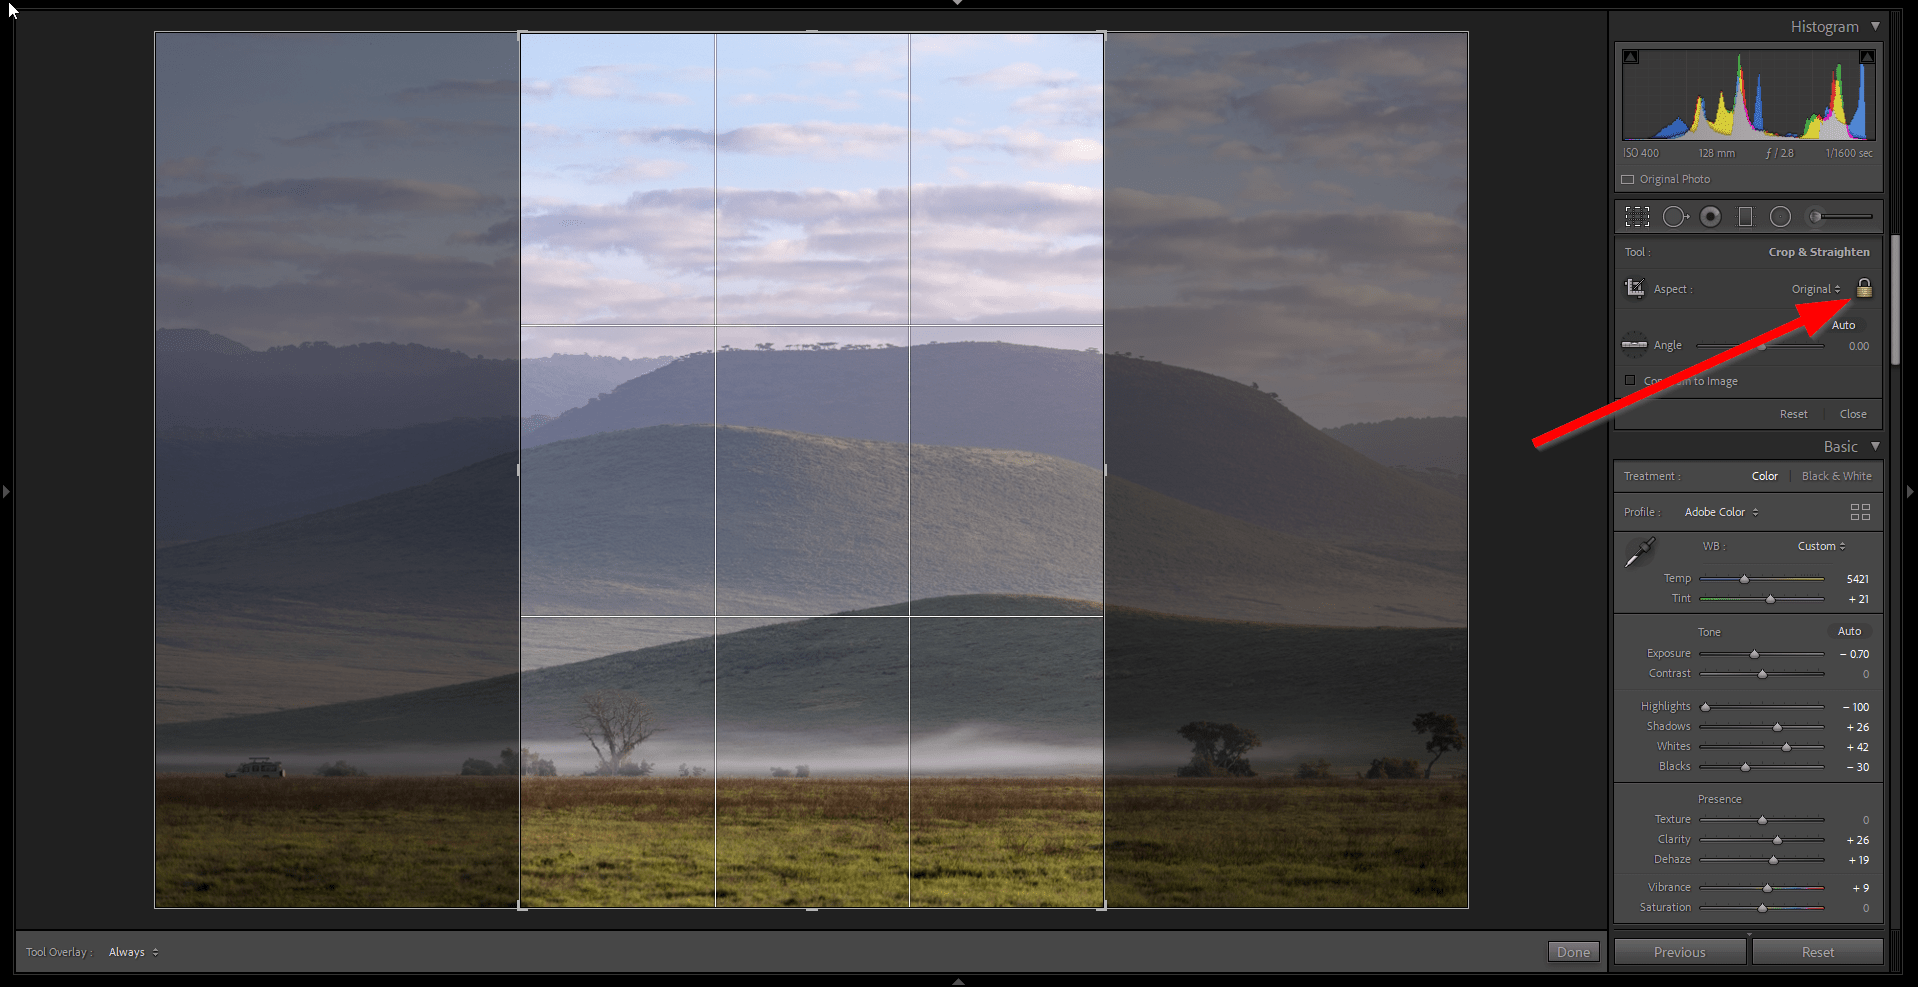
When you want to crop your photos, use the crop overlay by clicking on the button under the histogram or by pressing R on your keyboard.
Often the crop tool appears to be locked in the same aspect ratio as your photos. If you want to rotate the crop tool horizontally or vertically you can press the X key. You can also click on the padlock icon in the panel under the histogram to unlock the aspect ratio of the crop tool and freely crop the image to your liking.
Lightroom is a powerful program packed with helpful features. When you know your way around its shortcuts and little hacks you can really speed up your workflow and make your processing a lot easier.
— Daniel